Build a Weather Station with ESP32 and Sensors
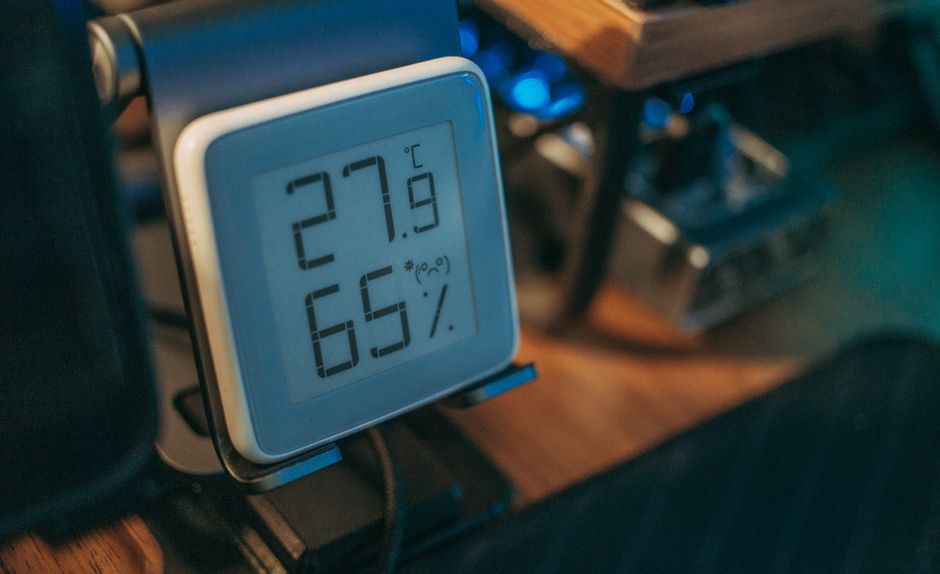
Measuring environmental conditions such as temperature, humidity, and atmospheric pressure can provide valuable insights for gardening, home automation, or simply understanding local weather patterns. A practical way to capture this data is by building a wireless weather station that transmits measurements to a central device for logging and display. This guide describes the process of assembling such a station using an ESP32 microcontroller and commonly available sensor modules.
The ESP32 is a versatile microcontroller with built-in Wi-Fi and Bluetooth capabilities, making it well suited for projects that require wireless communication. When paired with sensors that measure temperature, humidity, and pressure, it becomes the core of a compact weather station. The approach outlined here focuses on the steps involved in selecting components, wiring the circuit, writing the firmware, and transmitting data.
Circuit Pulse offers development boards and sensor modules that simplify the prototyping process, though the concepts apply to any ESP32-based setup. The following sections break down the hardware and software decisions that contribute to a functional weather station, without assuming guaranteed performance in all environments.
Selecting the Right Sensors for Environmental Monitoring
The accuracy and reliability of a weather station largely depend on the sensors chosen. For measuring temperature and humidity, the DHT22 sensor is a common choice because of its digital output and moderate accuracy. It can measure temperatures from -40 to 80 degrees Celsius with a precision of plus or minus 0.5 degrees and humidity from 0 to 100 percent with a precision of plus or minus 2 percent, depending on the specific unit and calibration.
For atmospheric pressure, the BME280 sensor provides readings of pressure, temperature, and humidity in a single package. It also offers better accuracy for pressure measurements, which is useful for altitude determination and weather trend analysis. Both sensors communicate via the I2C or one-wire protocol, which reduces the number of pins required. When selecting sensors, it is important to review their datasheets for operating ranges and communication timings, as these factors affect the overall stability of the data collection process.
A basic list of components for the station includes an ESP32 development board, a DHT22 or BME280 sensor, a breadboard, jumper wires, and a power source. Additional components such as a resistor for the DHT22 data line may be necessary, depending on the specific wiring configuration. A weatherproof enclosure is recommended for outdoor deployment, but for initial testing, an indoor setup is adequate.
Wiring the Circuit and Power Considerations
Once the components are gathered, the next step is to establish the electrical connections. For the DHT22, the data pin connects to a general-purpose input/output pin on the ESP32, such as GPIO4. A pull-up resistor of 4.7 to 10 kilo-ohms is typically placed between the data line and the 3.3 volt supply to maintain stable communication. The VCC pin connects to the 3.3 volt output of the ESP32, and the ground pin shares a common ground with the board.
For the BME280, the connections follow the I2C standard: SDA to GPIO21, SCL to GPIO22 on many ESP32 boards, with VCC and ground as before. It is advisable to double-check the pinout of the specific ESP32 board used, as some variants assign different pins. A multimeter can verify continuity and voltage levels during the initial setup.
Powering the weather station can be done via a USB cable connected to a computer or a wall adapter. For remote or wireless applications, a battery pack with a voltage regulator that provides a stable 3.3 volts is an option, though battery life will depend on the frequency of readings and the depth of sleep modes used. The ESP32 supports deep sleep, which can reduce power consumption significantly when the device is not actively transmitting or measuring.
Programming the ESP32 to Read Sensor Data
The firmware for the weather station can be developed using the Arduino Integrated Development Environment with the ESP32 board package installed. The first step is to install the appropriate sensor libraries, such as the DHT sensor library for the DHT22 or the Adafruit BME280 library for the BME280. These libraries handle the low-level communication and data conversion, allowing the programmer to focus on sampling intervals and data formatting.
A typical program begins by initializing the sensor and Wi-Fi connection. The loop function then reads the sensor values at a set interval, for example every ten seconds. The readings are converted to strings or numeric values that can be transmitted over the network. Error handling routines check for sensor faults or communication failures, and optionally log such events to the serial monitor for debugging.
It is important to include timing delays that respect the sensor’s measurement cycle. The DHT22 requires at least two seconds between readings to allow the internal measurement to complete. Ignoring this may result in stale or incorrect data. The ESP32’s timers can be used to schedule readings without blocking the main loop, which is beneficial when also handling network requests.
Wireless Data Transmission and Logging
After obtaining sensor readings, the ESP32 can transmit them to a local server or a cloud platform using Wi-Fi. One common method is to publish the data via MQTT, a lightweight messaging protocol suitable for IoT devices. The ESP32 connects to an MQTT broker, such as Mosquitto running on a Raspberry Pi or a cloud service, and publishes readings to topics like “weather/temperature” or “weather/humidity”.
Alternatively, the ESP32 can send HTTP requests to a web server that stores the data in a database. The choice between MQTT and HTTP often depends on the network infrastructure and the desired frequency of updates. MQTT uses less bandwidth and supports real-time subscriptions, while HTTP is simpler to implement for one-way data logging. Both approaches require stable Wi-Fi credentials stored in the firmware or provided through a configuration portal.
Data transmitted over the network may be subject to delays or packet loss, especially in areas with interference. Implementing acknowledgments or retransmission logic can improve reliability, but no method guarantees complete delivery under all conditions. For logging, the receiving end should be designed to handle missing or duplicate entries gracefully.
Considerations for Sensor Accuracy and Placement
The quality of data produced by the weather station depends on several external factors that are not fully controlled by the hardware or software. Sensor placement significantly affects readings. Direct sunlight, proximity to heat sources, or poor ventilation can cause temperature values to drift. A radiation shield, such as a naturally ventilated enclosure painted white, can reduce the influence of solar radiation on temperature measurements.
Humidity sensors are sensitive to condensation and may produce inaccurate results when exposed to high moisture levels for extended periods. Pressure sensors are generally less affected by placement, but rapid changes in altitude, such as when moving the station indoors to outdoors, require re-calibration or baseline adjustment. Calibration against a known reference, like a local weather station report, can provide a correction offset for temperature and pressure values, though this offset may shift over time as components age.
The resolution of the analog-to-digital converter on the ESP32 and the noise in the sensor power supply can also introduce small variations in the readings. Using a dedicated voltage regulator and decoupling capacitors near the sensor can help minimize noise. These measures contribute to better data consistency, but they do not eliminate all sources of error.
Expanding the Station with Additional Capabilities
Once the basic weather station is operational, there are several directions for further development. Adding a rain gauge or anemometer can broaden the range of environmental variables collected. The ESP32 has enough pins and processing power to handle additional sensors, provided the firmware is adjusted to manage the increased sampling load and power consumption.
Data visualization can be enhanced by feeding the logged values into a dashboard tool like Grafana or a custom web interface. Storing historical data allows users to observe trends over days, weeks, or months. However, the reliability of long-term data storage depends on the server infrastructure and the maintenance of the logging system.
Battery-powered stations benefit from power management strategies such as deep sleep between measurement cycles and the use of efficient sensors. Solar panels combined with a battery charging circuit can extend operation indefinitely in sunny climates, though performance varies with weather conditions. Each expansion adds complexity and requires careful testing to ensure the baseline functionality remains stable.
Building a weather station with an ESP32 and sensors is a process that involves selecting appropriate components, assembling the circuit, writing firmware, and configuring wireless communication. The outcome of each step depends on the specific hardware, environmental conditions, and the attention given to detail during calibration and testing. By following the procedures outlined here, one can create a tool for monitoring local weather data that can be adapted and extended over time.